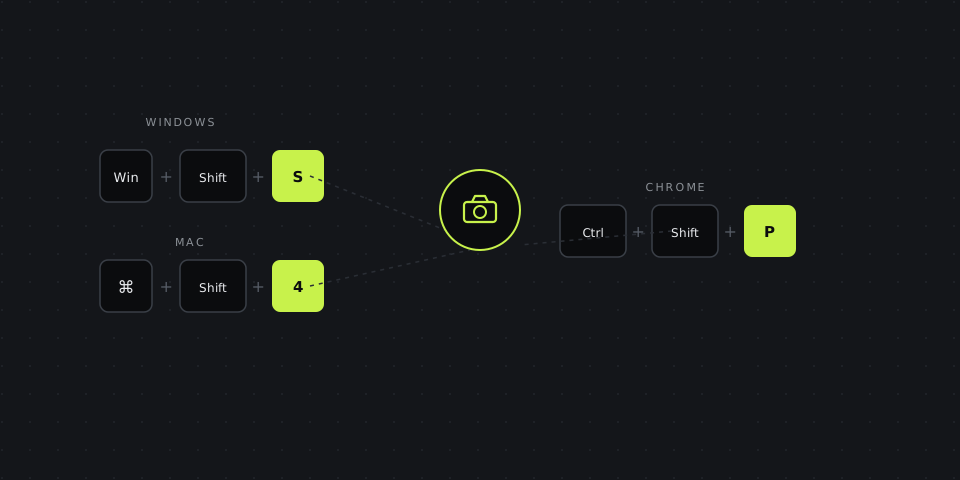
All shortcuts at a glance
If you just need the shortcut and nothing else, this is the whole answer. Everything below goes into more detail on each one — when to use it, what it actually captures, and where the file ends up.
| Platform | Shortcut | Captures | Goes to |
|---|---|---|---|
| Windows | Win + Shift + S | A region you drag to select | Clipboard, with a popup to annotate or save |
| Windows | Win + PrtScn | The full screen | Pictures\Screenshots, saved automatically |
| Windows | Alt + PrtScn | The active window only | Clipboard only |
| Mac | Cmd + Shift + 3 | The full screen | Desktop |
| Mac | Cmd + Shift + 4 | A region you drag to select | Desktop |
| Mac | Cmd + Shift + 4, then Space | A single window, with its shadow | Desktop |
| Mac | Cmd + Shift + 5 | Opens a toolbar: region, window, full screen, or recording | Desktop, or wherever you set in Options |
| Chrome (any OS) | Ctrl/Cmd + Shift + P, type "screenshot" | The visible tab or the entire scrollable page | Downloads folder |
| DashShot | Ctrl/⌘ + Shift + 1 | A region you select, opens straight into an editor | Instant link + clipboard |
Add Ctrl to any of the Mac shortcuts above (Cmd+Ctrl+Shift+3, for instance) and it copies to your clipboard instead of saving a file to the Desktop — useful when you're about to paste it somewhere rather than keep it.
Windows: three shortcuts cover almost everything
Win + Shift + S is the one worth memorizing. It dims the screen, turns your cursor into a crosshair, and lets you drag out a rectangle — or switch to fullscreen, window, or freeform capture from the small toolbar at the top. The result goes to your clipboard immediately, and a notification pops up in the corner: click it within a few seconds to open the built-in editor and add a quick markup before it disappears.
Win + PrtScn skips the selection step entirely — it captures the whole screen instantly and saves a file straight to Pictures → Screenshots, no clipboard step and no editor. This is the fastest option when you know you want the entire screen and don't need to mark anything up.
Alt + PrtScn captures only the currently active window — useful when you have a dozen overlapping windows and want just the one in focus, without cropping out the rest afterward. Like plain PrtScn, it copies to the clipboard rather than saving a file.
For anything beyond a one-off — a delay timer before capturing, a specific window from a list, or freeform shapes — open the Snipping Tool app directly (search for it in the Start menu) rather than the Win+Shift+S shortcut. It's the same underlying tool with a few more options exposed.
Mac: four shortcuts, one toolbar
Cmd + Shift + 3 captures the entire screen and saves a PNG to the Desktop, with a thumbnail preview appearing in the bottom-right corner for a few seconds — click it before it fades to jump straight into markup, or ignore it and the file saves as-is.
Cmd + Shift + 4 turns the cursor into a crosshair for a region selection, the Mac equivalent of Windows' Win+Shift+S. Drag out the area, release, and it saves to the Desktop the same way as the full-screen version.
Cmd + Shift + 4, then Space switches to window-capture mode — the cursor becomes a small camera, and clicking any window captures just that window, drop shadow included, without needing to crop out anything else on screen.
Cmd + Shift + 5 is the one to reach for when you want more control before capturing: it opens a small toolbar with explicit buttons for full-screen, window, and region capture, plus a "Recording" mode for video, an Options menu for a capture-delay timer, and a setting for where files get saved instead of always defaulting to the Desktop.
Chrome: capturing more than what's on screen
Chrome's built-in DevTools has a screenshot command that most people never find, because it's buried in a command menu rather than a visible button. Open DevTools with Ctrl/Cmd + Shift + I (or right-click anywhere on the page → Inspect), then press Ctrl/Cmd + Shift + P to open the command menu and type "screenshot." Three options appear: Capture screenshot (just the visible viewport, identical to a normal screenshot), Capture full size screenshot (the entire page, including everything below the fold that you'd otherwise have to scroll to and stitch together), and Capture node screenshot (a single element you've selected in the Elements panel).
"Capture full size screenshot" is the one worth knowing — it's the only built-in way in Chrome to get a long, scrolling webpage as one continuous image without a third-party extension. The tradeoff is the multi-step path to get there: open DevTools, open the command menu, type the command, wait for it to render and download. A dedicated Chrome extension reduces that to one click on the toolbar icon.
Why a dedicated tool still beats the built-in shortcut
Every method above shares the same limitation once the screenshot is actually taken: you're on your own for anything that happens next. Marking something up means opening a separate editor — Preview on Mac, Paint or the Snipping Tool's own editor on Windows — and sending it means attaching a file to an email or dragging it into a chat window, hoping the recipient can actually open whatever format it saved as.
DashShot replaces that entire second half of the process. The region-capture shortcut (Ctrl/⌘+Shift+1) opens directly into an editor with arrows, text, blur, and cropping already available — no switching apps — and finishing the edit generates a link immediately, which opens for whoever you send it to without them needing an account or a matching file viewer.
Where your screenshots actually go
The most common point of confusion isn't taking the screenshot — it's finding it afterward. On Windows, Win+PrtScn saves to Pictures → Screenshots automatically, but Win+Shift+S and PrtScn only copy to the clipboard, so if you close the notification without pasting, the image is gone rather than sitting in a folder somewhere. On Mac, everything from Cmd+Shift+3/4/5 saves to the Desktop by default, which is why Mac desktops tend to accumulate dozens of screenshot files named with a timestamp — Cmd+Shift+5's Options menu is where you change that default location.
This is the specific gap a link-based tool closes: nothing to lose track of in a folder, because the screenshot exists at a URL the moment you're done editing it, not as a file you have to remember where you saved.
What to do if the Print Screen key isn't working
A few laptops, especially compact ones, ship without a dedicated Print Screen key, or bury it behind an Fn combination that isn't obvious from the keycap alone. If PrtScn does nothing:
- Try Fn + PrtScn (or Fn + the key that has "PrtScn" printed as a secondary function, often sharing a key with F10, F11, or the Insert key on compact keyboards).
- Win + Shift + S works independently of the PrtScn key on any Windows machine — it's the more reliable option if your keyboard layout is nonstandard.
- On Mac, the Cmd+Shift shortcuts don't depend on a Print Screen key at all — Macs have never had one, so this isn't a factor there.
- Check whether a background app has claimed the shortcut. Some remote-desktop tools, screen-recording software, or corporate security software intercept PrtScn for their own purposes, which silently blocks the system default from firing.
Common screenshot problems and quick fixes
The screenshot is blurry on a high-resolution display. This is almost always a scaling mismatch rather than a capture problem — the image itself is usually captured at full resolution, but appears soft when viewed at a size smaller than its actual pixel dimensions. Open the file at 100% zoom rather than however your image viewer auto-fit it, and the blur usually disappears.
A notification or menu bar item shows up in every screenshot. Notifications that pop up mid-capture will get caught if your timing is off — waiting a beat after dismissing something before capturing avoids this more reliably than trying to time around it.
The screenshot captures the wrong monitor in a multi-display setup. Win+PrtScn and Cmd+Shift+3 both capture every connected display by default, stitched into one wide image — if you only want one screen, use the region-select variant (Win+Shift+S or Cmd+Shift+4) and drag within just the monitor you want.
Capturing a menu that closes when you click away, or timing a delayed shot
Right-click menus, dropdowns, and hover tooltips all disappear the instant you switch to a screenshot tool, which makes them awkward to capture with an instant shortcut. Both major platforms have a delay option for exactly this: on Mac, open the Cmd+Shift+5 toolbar and use the Options menu to set a 5 or 10 second timer, open the menu you need during the countdown, and it fires automatically. On Windows, the Snipping Tool app (not the Win+Shift+S shortcut, which doesn't have this option) has its own delay timer in the toolbar — set it, open the menu, and wait.
The same Options menus also control whether the mouse cursor itself shows up in the final image — off by default on both platforms, which is usually what you want unless you're specifically demonstrating where to click.