Why record instead of just explaining it live
A screen recording covers everything a screenshot can't: a sequence of clicks, a bug that only shows up mid-workflow, a setting buried three menus deep. It also replaces a live call for a lot of the explanations people default to scheduling a meeting for — a 90-second recording walking through a change gets watched whenever the other person has a free minute, instead of requiring both calendars to line up first.
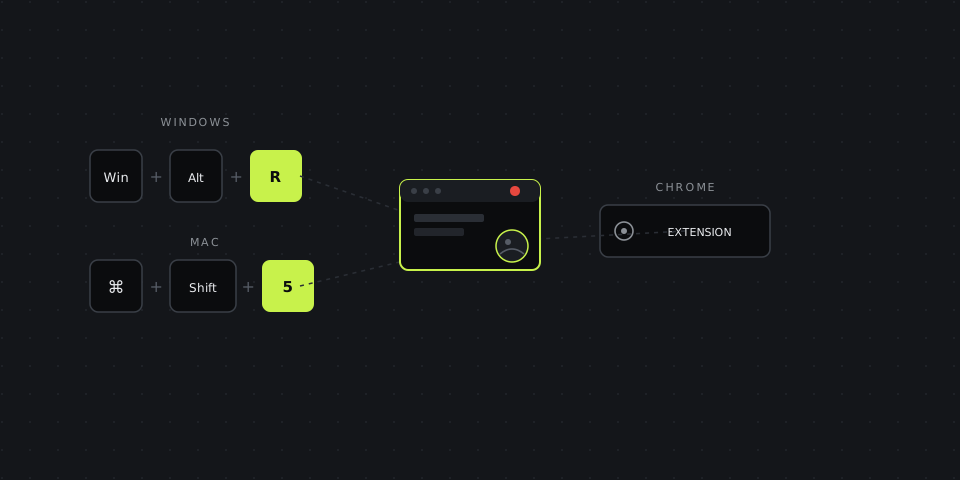
The methods below cover Windows, Mac, and Chrome. All of them are free and built in — no install required for the first two, and a one-click extension for the third.
All methods at a glance
If you just need the shortcut and nothing else, this is the whole answer. More detail on each one below — what it actually records, and what you get stuck doing afterward.
| Platform | Shortcut / method | Records | After you stop |
|---|---|---|---|
| Windows | Win + Alt + R | The active window or full screen, with mic audio if enabled | Saves an .mp4 to Videos\Captures |
| Windows | Win + G (Xbox Game Bar) | Same as above, with a visible control panel first | Same folder, more options before you start |
| Mac | Cmd + Shift + 5 | Full screen or a region you select | Saves a .mov to the Desktop |
| Chrome | No native recorder — needs an extension | A tab, a window, or your whole screen | Depends on the extension |
| DashShot | Ctrl/⌘ + Shift + 9 | A tab, window, or region, with camera bubble and mic | Instant link, auto-transcribed |
Windows: two shortcuts, same underlying tool
Win + Alt + R is the fast path — it starts recording immediately, no overlay, no setup screen. A small recording indicator appears in the corner, and pressing the same shortcut again stops it. This only records the currently active window by default, not the whole desktop, which trips people up the first time: switching to a different app mid-recording can end the capture if that other window isn't part of the same fullscreen app context.
Win + G opens the full Xbox Game Bar overlay first, with a visible record button, a mic toggle, and a widget for adjusting audio levels before you start. It's the better choice when you want to check your microphone is actually picked up before recording ten minutes of silent narration.
Both save an .mp4 automatically to Videos → Captures — there's no export or "save as" dialog to remember to click through.
Mac: one toolbar, two recording modes
Cmd + Shift + 5 opens the same screenshot toolbar covered in taking a screenshot, with two recording-specific buttons: record the entire screen, or record a selected portion. Click the portion option and a draggable rectangle appears — resize it to the exact area, then click Record inside it to start.
The Options menu in that same toolbar is where microphone selection lives, along with a timer delay and the choice of save location. Recordings default to .mov on the Desktop, and a small stop-recording icon sits in the menu bar the entire time you're capturing — click it (or Cmd+Ctrl+Esc) to end the recording.
One easy miss: system audio (sound from the app you're recording, not your voice) isn't captured by default on Mac. Capturing it requires selecting a virtual audio device in Options, which most people never see because it's a step past what's visible on first use.
Chrome: no built-in recorder, so the extension is the method
Unlike the DevTools screenshot trick, Chrome has no hidden command-menu option for recording — there's genuinely no native way to record your screen from inside the browser alone. Anything that records a browser tab, window, or full screen from Chrome is doing it through an installed extension, which is also the only way to get a recording that starts and stops from the toolbar rather than switching out to a separate app.
DashShot's Chrome extension covers this directly — the same toolbar icon used for screenshots also starts a recording, with a small camera bubble overlay if you want your face visible in the corner, and picks up both your microphone and the tab's own audio without a separate settings step.
What happens after you stop recording
This is where the built-in tools and a dedicated recorder diverge the most. Win+Alt+R and Cmd+Shift+5 both leave you with a video file sitting in a folder — genuinely useful if the recording is for yourself, much less useful the moment you need to send it to someone else. A 3-minute screen recording easily runs 40-80MB, which is too large for most chat apps to preview inline and often too large for email attachments outright, so it becomes a file someone has to download rather than a video they can just press play on.
DashShot skips the file entirely: the recording generates a link the moment you stop, playable directly in a browser with no download. It also transcribes the recording automatically and can turn it into a written, step-by-step walkthrough — useful for anything you'll want to reference again later without re-watching the whole video to find the one part that mattered.
Common problems and quick fixes
No sound in the recording. On Windows, check that the mic toggle in Game Bar's audio widget is actually on — it's easy to record a full explanation only to discover the mic was muted from the start. On Mac, remember that microphone and system audio are two separate settings in the Cmd+Shift+5 Options menu; having one enabled doesn't mean the other is too.
The recording only captured one window, not the whole desktop. This is expected behavior for Win+Alt+R specifically — it's tied to the active window, not the full screen. Use Win+G's Game Bar, or Cmd+Shift+5's "entire screen" option on Mac, if you need everything visible, including switching between apps mid-recording.
The file is too large to send. Trimming dead air at the start and end helps somewhat, but the more reliable fix is not sending a file at all — a link-based recording plays instantly without anyone downloading anything first, regardless of the underlying file size.
Showing your face while you record
A small camera bubble in the corner of the recording — the same layout Zoom and video calls use — makes a walkthrough noticeably more personal than a silent cursor moving around a screen, especially for anything going to a client rather than a teammate who already knows your voice. Windows' Game Bar and Mac's Cmd+Shift+5 toolbar don't offer this natively; it's specifically a feature of dedicated recording tools rather than the OS-level shortcuts.
It's also optional per recording rather than an all-or-nothing setting — worth turning on for anything explanatory and off for a quick bug capture where your face adds nothing to what the viewer needs to see.